
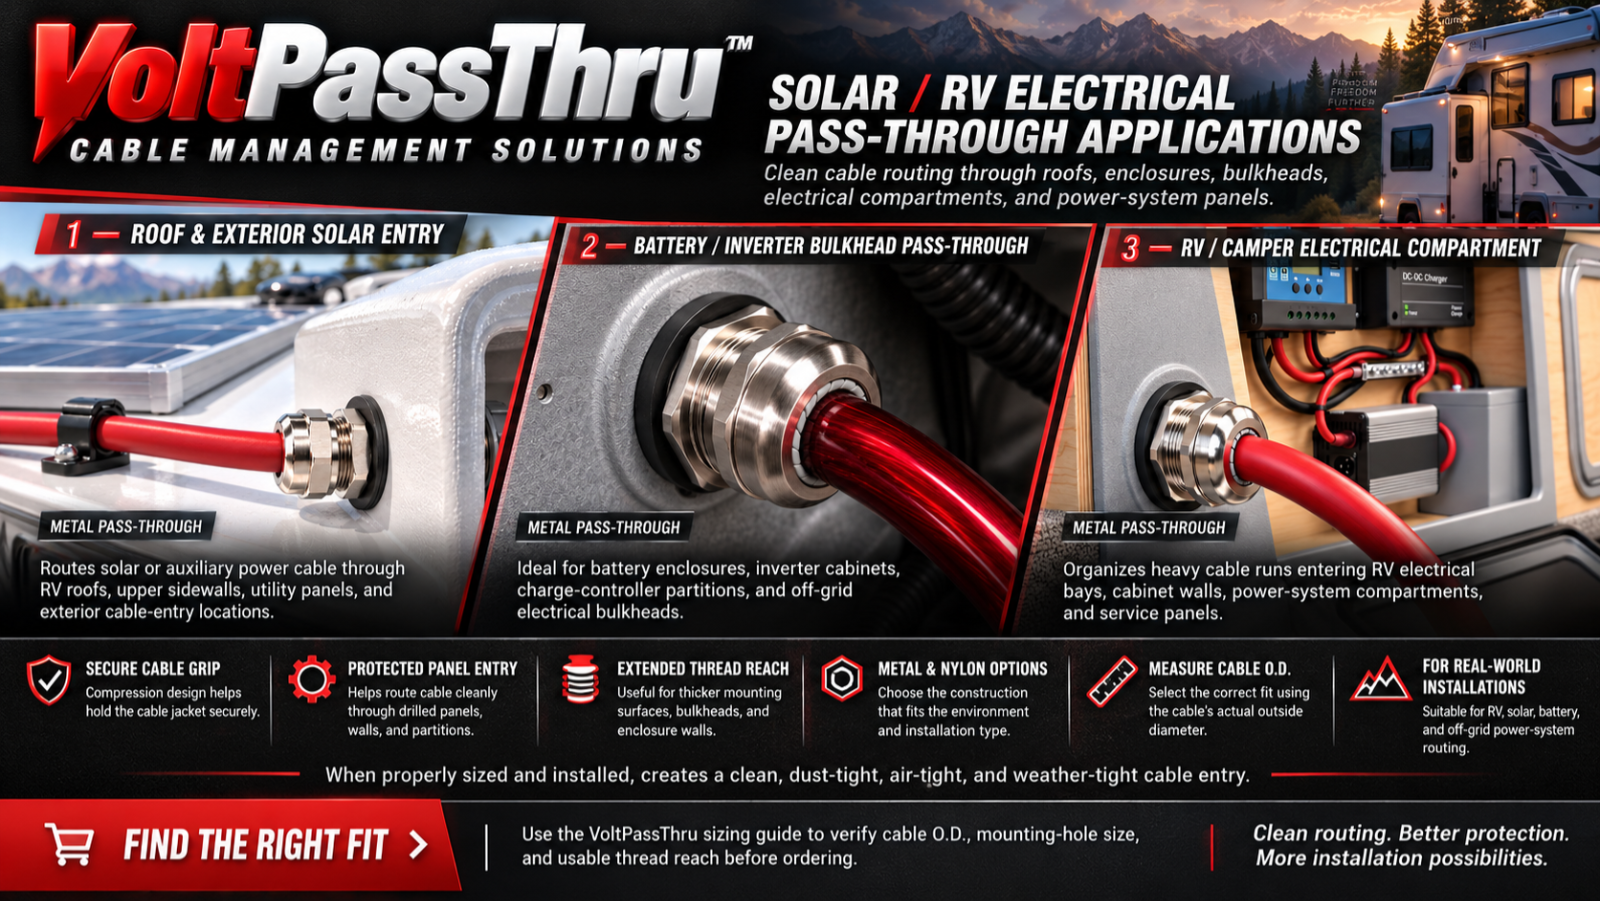
RVs, camper vans, motorhomes, and overland builds route electrical wiring through many different parts of the vehicle—from rooftop solar entries and house-battery compartments to floors, cabinet partitions, and chassis penetrations. VoltPassThru helps create clean mechanical cable-entry points while directing each installation toward the appropriate Auto or Solar sizing path. Choose the routing location first, then verify the cable’s actual outside diameter, required mounting-hole size, panel thickness, and available rear clearance.
Choose the Series by Where the Cable Is Routed
VoltPassThru Auto
For cable routes involving the vehicle firewall, chassis, floor pan, alternator wiring, starter/battery routing, or other automotive structural penetrations.
- Engine bay to passenger compartment
- Alternator or starter-battery cable routing
- DC-DC charger feed through vehicle firewall or floor
- Chassis / underbody cable transitions
VoltPassThru Solar
For rooftop solar cable entry, house-battery systems, inverter compartments, electrical cabinets, interior partitions, and off-grid power equipment.
- Rooftop solar cable entry
- House battery / inverter compartment
- Solar controller and electrical cabinet entry
- Interior power-system partitions
Common RV & Camper Cable Pass-Through Locations
Roof & Exterior Solar Cable Entry
Rooftop solar and exterior equipment route cabling through the RV roof or upper body into interior distribution spaces. Sizing centers around measured Cable O.D., panel thickness, mounting-hole size, and usable thread reach.
- Rooftop solar wiring entering interior cabinetry
- Exterior solar array and equipment cabling
- RV roof and upper-body panel transitions
Battery & Electrical Compartments
House battery banks, inverter bays, and distribution cabinets require heavy cables passing between compartments and interior partitions. Selection balances measured Cable O.D., panel thickness, usable thread reach, rear clearance, and bend radius.
- House battery to inverter DC cabling
- Battery bay to cabinet wall partitions
- Inverter and charger distribution wiring
Floor, Chassis & DC-DC Routing
Electrical circuits crossing from the vehicle chassis into the living space—such as alternator-to-DC-DC charger lines, underbody feeds, or auxiliary battery routes—pass through structural floor pans and automotive sheet metal.
- Alternator-to-DC-DC charger cable feeds
- Vehicle floor pan and underbody transitions
- Chassis-to-house-electrical wiring
Auto or Solar? Start With Where the Cable Passes
An RV may use both VoltPassThru product paths. If the cable passes through automotive structure such as the firewall, chassis, or vehicle floor, start with VoltPassThru Auto. If it passes through a solar enclosure, battery compartment, inverter cabinet, or house-electrical partition, start with VoltPassThru Solar.
Understanding RV Panel Materials
Vehicle Sheet Metal
Factory floor pans, firewalls, and exterior sheet metal. Route toward VoltPassThru Auto. Deburr clean holes, protect bare metal against corrosion, and verify rear clearance for locknut tightening.
Plywood & Composite Cabinetry
Interior equipment bays, battery boxes, and conversion partitions. Route toward VoltPassThru Solar. Verify total panel thickness against usable thread reach and confirm mounting surfaces provide sufficient rigidity.
Fiberglass & Composite RV Panels
Camper exterior body walls, fiberglass roofs, and molded storage bays. Path depends on application. Drill cleanly to prevent gelcoat chipping, seat sealing washers evenly, and avoid overtightening.
Electrical Enclosure Panels
Dedicated battery boxes, inverter cabinets, and combiner enclosures. Route toward VoltPassThru Solar. Size strictly by measured Cable O.D., ensure a flat surface for sealing washers, and allow cable bend clearance.
RV Cable Routing & Support Considerations
Measure Finished Cable O.D.
Measure actual jacket outside diameter with calipers across multiple points; nominal AWG or mm² conductor sizing does not determine finished cable diameter.
Maintain Cable Bend Radius
Avoid sharp right-angle bends directly after the pass-through; provide adequate looping space, especially on heavy battery or inverter conductors.
Support Heavy Cable Runs
Anchor cable runs with mechanical clamps along the route so the pass-through fitting does not carry unsupported dynamic cable weight during vehicle motion.
Verify Rear Clearance
Ensure sufficient interior room behind the panel for locknut tightening, tool access, cable bend radius, and anti-chafe components where applicable.
Check Panel Thickness
Camper cabinetry, insulated floors, and composite walls often exceed sheet metal; verify the complete panel stackup against usable thread reach.
Protect Cut Metal
For vehicle sheet-metal penetrations, deburr the hole thoroughly and treat exposed bare metal with corrosion protection before assembling hardware.
Weather & Environmental Sealing
When correctly sized and properly installed, the compression gland creates a dust-tight, air-tight, and weather-tight cable entry around the cable jacket and mounting surface. Exterior RV penetrations may also require application-specific flashing, sealants, roof-system components, or manufacturer-approved installation practices around the overall penetration.
Choosing Metal or Nylon for an RV Installation
Nylon Pass-Throughs
Lightweight PA66 polyamide body delivers compression cable grip and natural electrical isolation. Well suited for interior cabinets, electrical enclosures, fiberglass panels, and smaller cable entries where non-conductive construction is desirable.
Need the Correct Hardware Size?
Once you know where the cable passes through the RV, measure the finished Cable O.D. and use the appropriate Auto or Solar sizing guide.
For step-by-step panel drilling, washer orientation, and locknut mounting, see our Cable Pass-Through Installation Guide.
Frequently Asked RV & Camper Wiring Questions
Ready to Plan Your RV Cable Route?
Identify where the cable crosses the RV first. Then choose the Auto or Solar sizing path and verify Cable O.D., mounting-hole size, panel thickness, and available clearance.
Not sure which path applies? Measure your cable’s finished outside diameter and contact us with the cable location, finished Cable O.D., and panel type.
For utility, equipment, and enclosed cargo trailer installations, see our Trailer Wiring Guide.


